Install AWX
AWX is a GUI tool for Ansible. In this article we will deploy AWX on a Kubernetes cluster. We also have GitLab-CE to store playbooks and manage the version.
The first step is to clone AWX:
git clone https://github.com/ansible/awx.git
Then you need to complete the inventory file. AWX will be deployed with Ansible. You also need to have Ansible, Helm and kubectl installed.
The installation is explained here: https://github.com/ansible/awx/blob/devel/INSTALL.md
You need to modify some variables to describe which K8s cluster you will use:
- c01-m1 is the kubernetes master node
- kubernetes-admin@kubenetes is the context name
c01-m1 ansible_python_interpreter="/usr/bin/env python3"
[..]
kubernetes_context=kubernetes-admin@kubernetes
kubernetes_namespace=awx
kubernetes_web_svc_type=LoadBalancer
Now you will be able to deploy AWX on your cluster with Ansible :
ansible-playbook -i inventory install.yml
Check your deployment:
kubectl get svc,pod,pvc -n awx

The default credential is admin / password.
GitLab-CE
Now you need a Git repository with one playbook.
You can easily deploy Gitlab-ce with Docker inside Kubernetes.
Example:
apiVersion: apps/v1
kind: Deployment
metadata:
  name: gitlab-ce
  labels:
    app: gitlab-ce
spec:
  replicas: 1
  selector:
    matchLabels:
      app: gitlab-ce
  template:
    metadata:
      labels:
        app: gitlab-ce
    spec:
      containers:
      - name: gitlab-ce
        image: gitlab/gitlab-ce
        ports:
        - containerPort: 22
        - containerPort: 80
---
apiVersion: v1
kind: Service
metadata:
  name: svc-gitlab-ce
  labels:
    app: gitlab-ce
spec:
  ports:
  # make the service available on this port
  - port: 22
    targetPort: 22
    protocol: TCP
    name: ssh
  - port: 80
    targetPort: 80
    protocol: TCP
    name: http
  selector:
    # apply this service to the pod with the label app: mysql
    app: gitlab-ce
  type: LoadBalancer
Now we create on project with one playbook named : query_tenant.yml
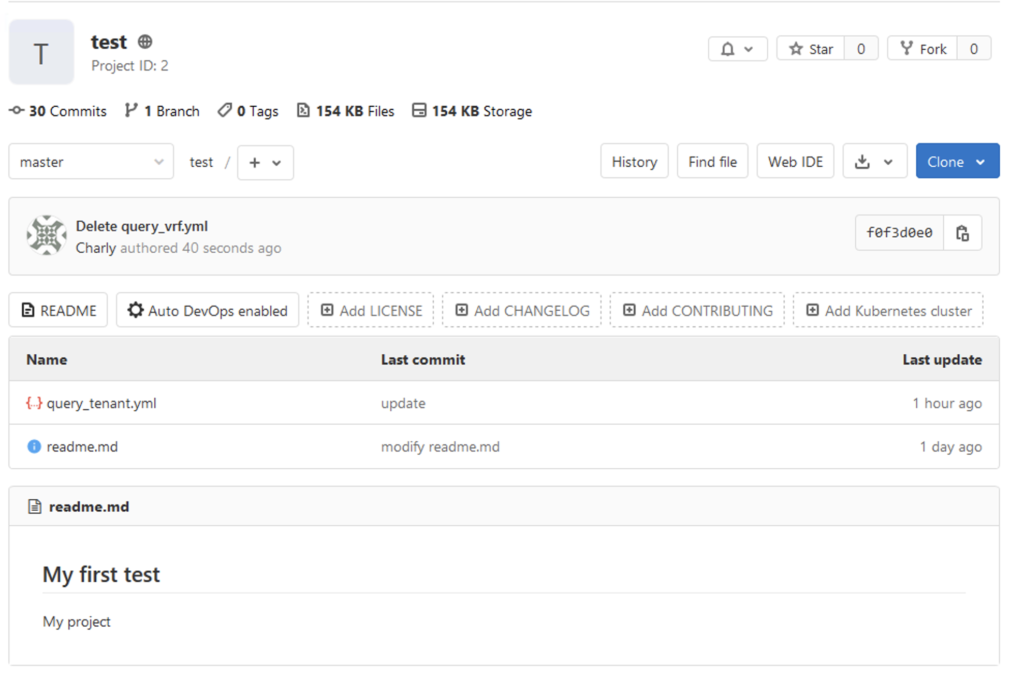
The playbook : query_tenant.yml.
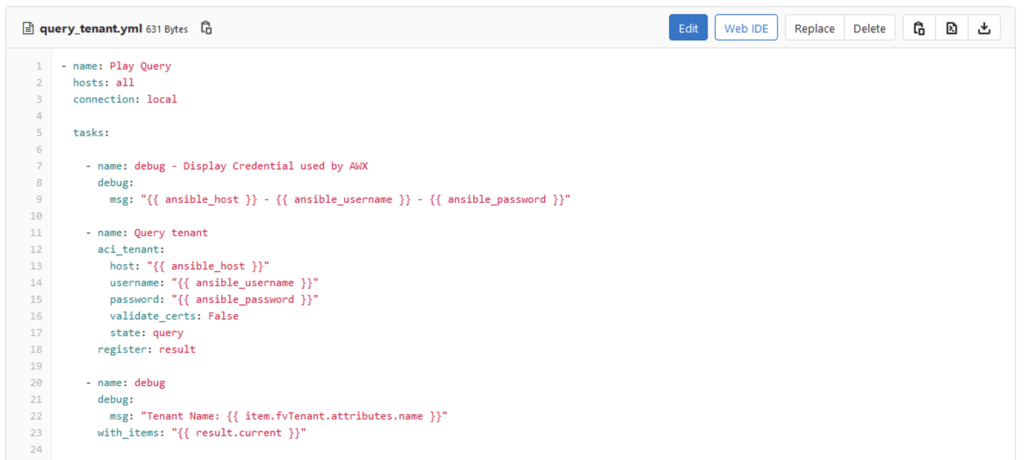
This is a very basic playbook with three tasks:
- The first task is just to verify and understand the parameter push by AWX
- The second send a query to get the tenant list in the ACI fabric
- The latest is to display the result.
This playbook can be write by a developer and push on Gitlab when it works. Then this playbook will be used in AWX.
The inventory file is used by the developer. Then the credential and inventory will be configured in AWX.
$ ansible-playbook -i inventory query_tenant.yml
PLAY [Play Query] ****
TASK [Gathering Facts] *
ok: [10.202.0.1]
TASK [debug - Display Credential used by AWX] ****
ok: [10.202.0.1] => {
"msg": "10.202.0.1 - admin - cisco1234"
}
TASK [Query tenant] **
ok: [10.202.0.1]
TASK [Display Tenant]
ok: [10.202.0.1] => (item={u'fvTenant': {u'attributes': {u'dn': u'uni/tn-infra', u'status': u'', u'ownerKey': u'', u'uid': u'0', u'descr': u'', u'extMngdBy': u'', u'annotation': u'', u'lcOwn': u'local', u'monPolDn': u'uni/tn-common/monepg-default', u'modTs': u'2019-11-13T18:44:22.536+00:00', u'ownerTag': u'', u'childAction': u'', u'nameAlias': u'', u'name': u'infra'}}}) => {
"msg": "Tenant Name: infra"
}
ok: [10.202.0.1] => (item={u'fvTenant': {u'attributes': {u'dn': u'uni/tn-mgmt', u'status': u'', u'ownerKey': u'', u'uid': u'0', u'descr': u'test', u'extMngdBy': u'', u'annotation': u'', u'lcOwn': u'local', u'monPolDn': u'uni/tn-common/monepg-default', u'modTs': u'2020-07-09T16:15:03.963+00:00', u'ownerTag': u'', u'childAction': u'', u'nameAlias': u'', u'name': u'mgmt'}}}) => {
"msg": "Tenant Name: mgmt"
}
ok: [10.202.0.1] => (item={u'fvTenant': {u'attributes': {u'dn': u'uni/tn-common', u'status': u'', u'ownerKey': u'', u'uid': u'0', u'descr': u'', u'extMngdBy': u'msc', u'annotation': u'orchestrator:msc', u'lcOwn': u'local', u'monPolDn': u'uni/tn-common/monepg-default', u'modTs': u'2019-11-13T19:45:10.901+00:00', u'ownerTag': u'', u'childAction': u'', u'nameAlias': u'', u'name': u'common'}}}) => {
"msg": "Tenant Name: common"
}
[..]
PLAY RECAP ***
10.202.0.1 : ok=4 changed=0 unreachable=0 failed=0
Configure AWX
Login to AWX
By default, it’s admin / password
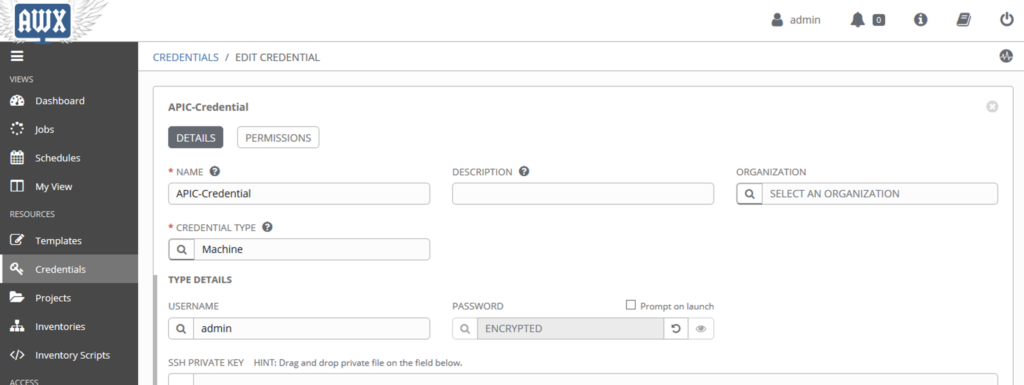
Create a credential
Here we will create a new credential. With Cisco ACI, we will use the credential type: Machine.
We will be able to use it with the following parameter in the playbook:
ansible_username
ansible_password
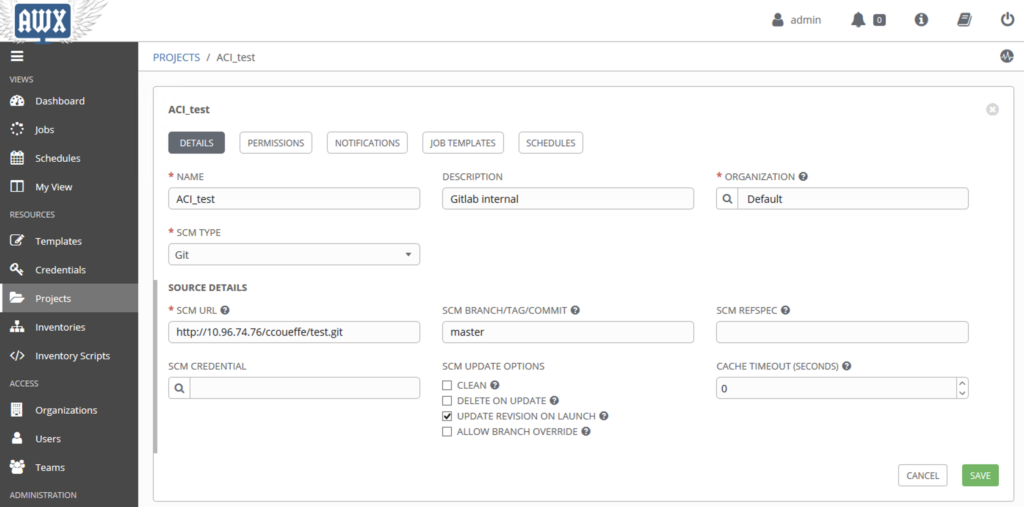
Create a project
Now we create a project. The project will point to a Gitlab repository. We have also selected the option : “Update Revision on launch”. This option permits to synchronize Gitlab and get the last version.
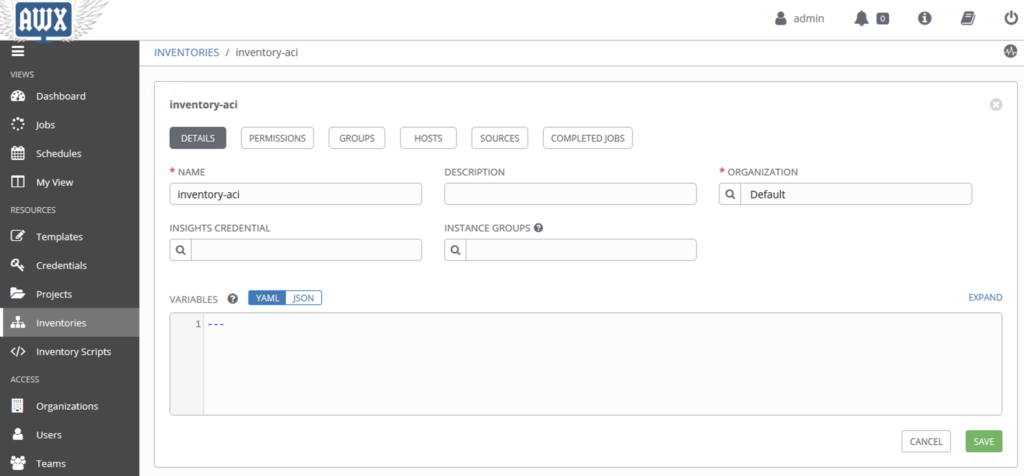
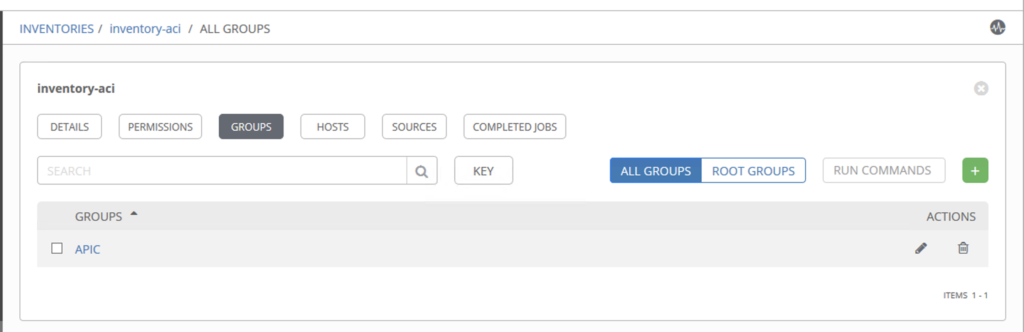
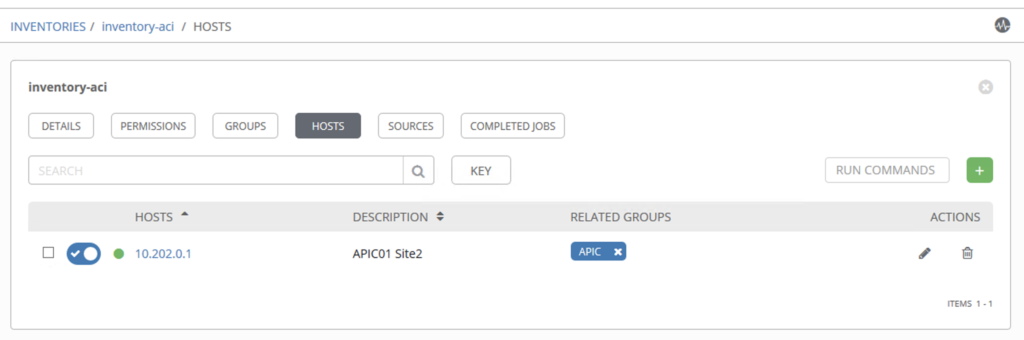
Create an inventory
In this step we will create an inventory, which contains a Group: APIC with one host : 10.202.0.1 (the ACI controller)
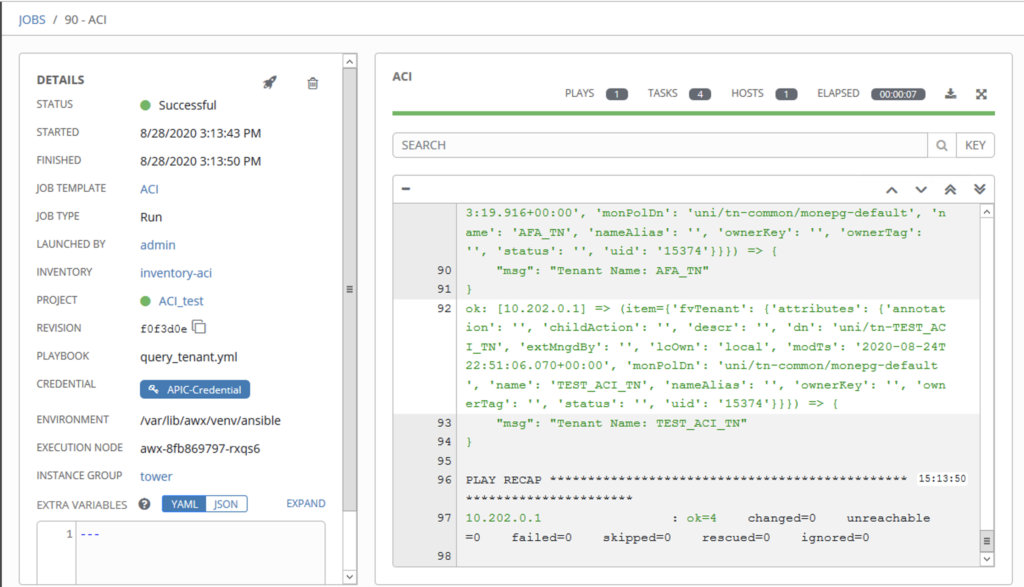
Create a job
Now we need to create one job to play the playbook in GitLab with the inventory and credential in AWX.
You need to enter :
- A name
- Job type : Run
- Inventory, where you select the previous inventory
- Project: Just a name
- Playbook, where you select the playbook from Git. If you see nothing, the playbook is probably not good.
- Credentials, where you select your credential
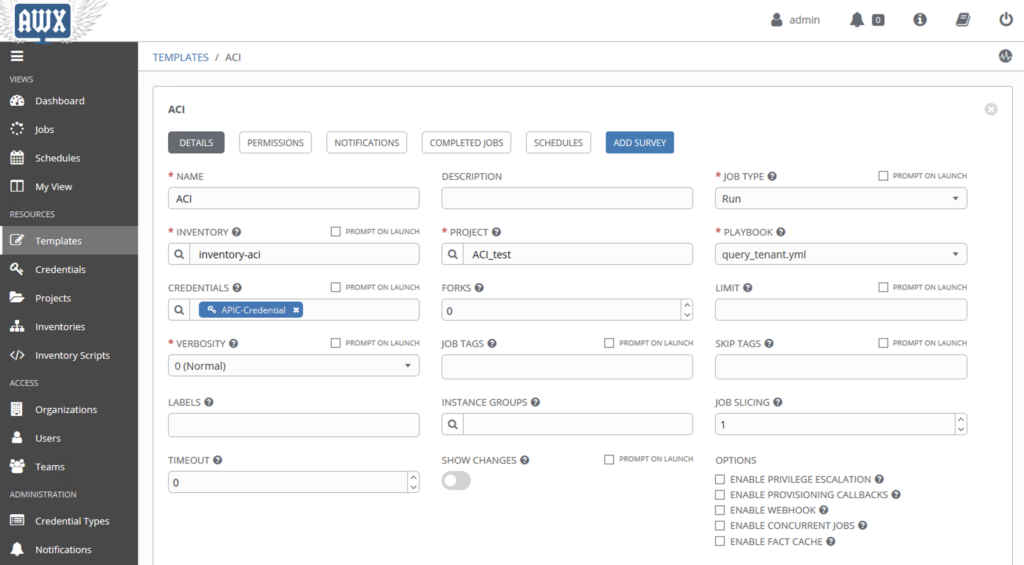
If everything is good, you can save your Template and launch it.
Play template
After click on the launch button, you will see the following window.